Transforming Your Environment with Color and Specialty Finishes
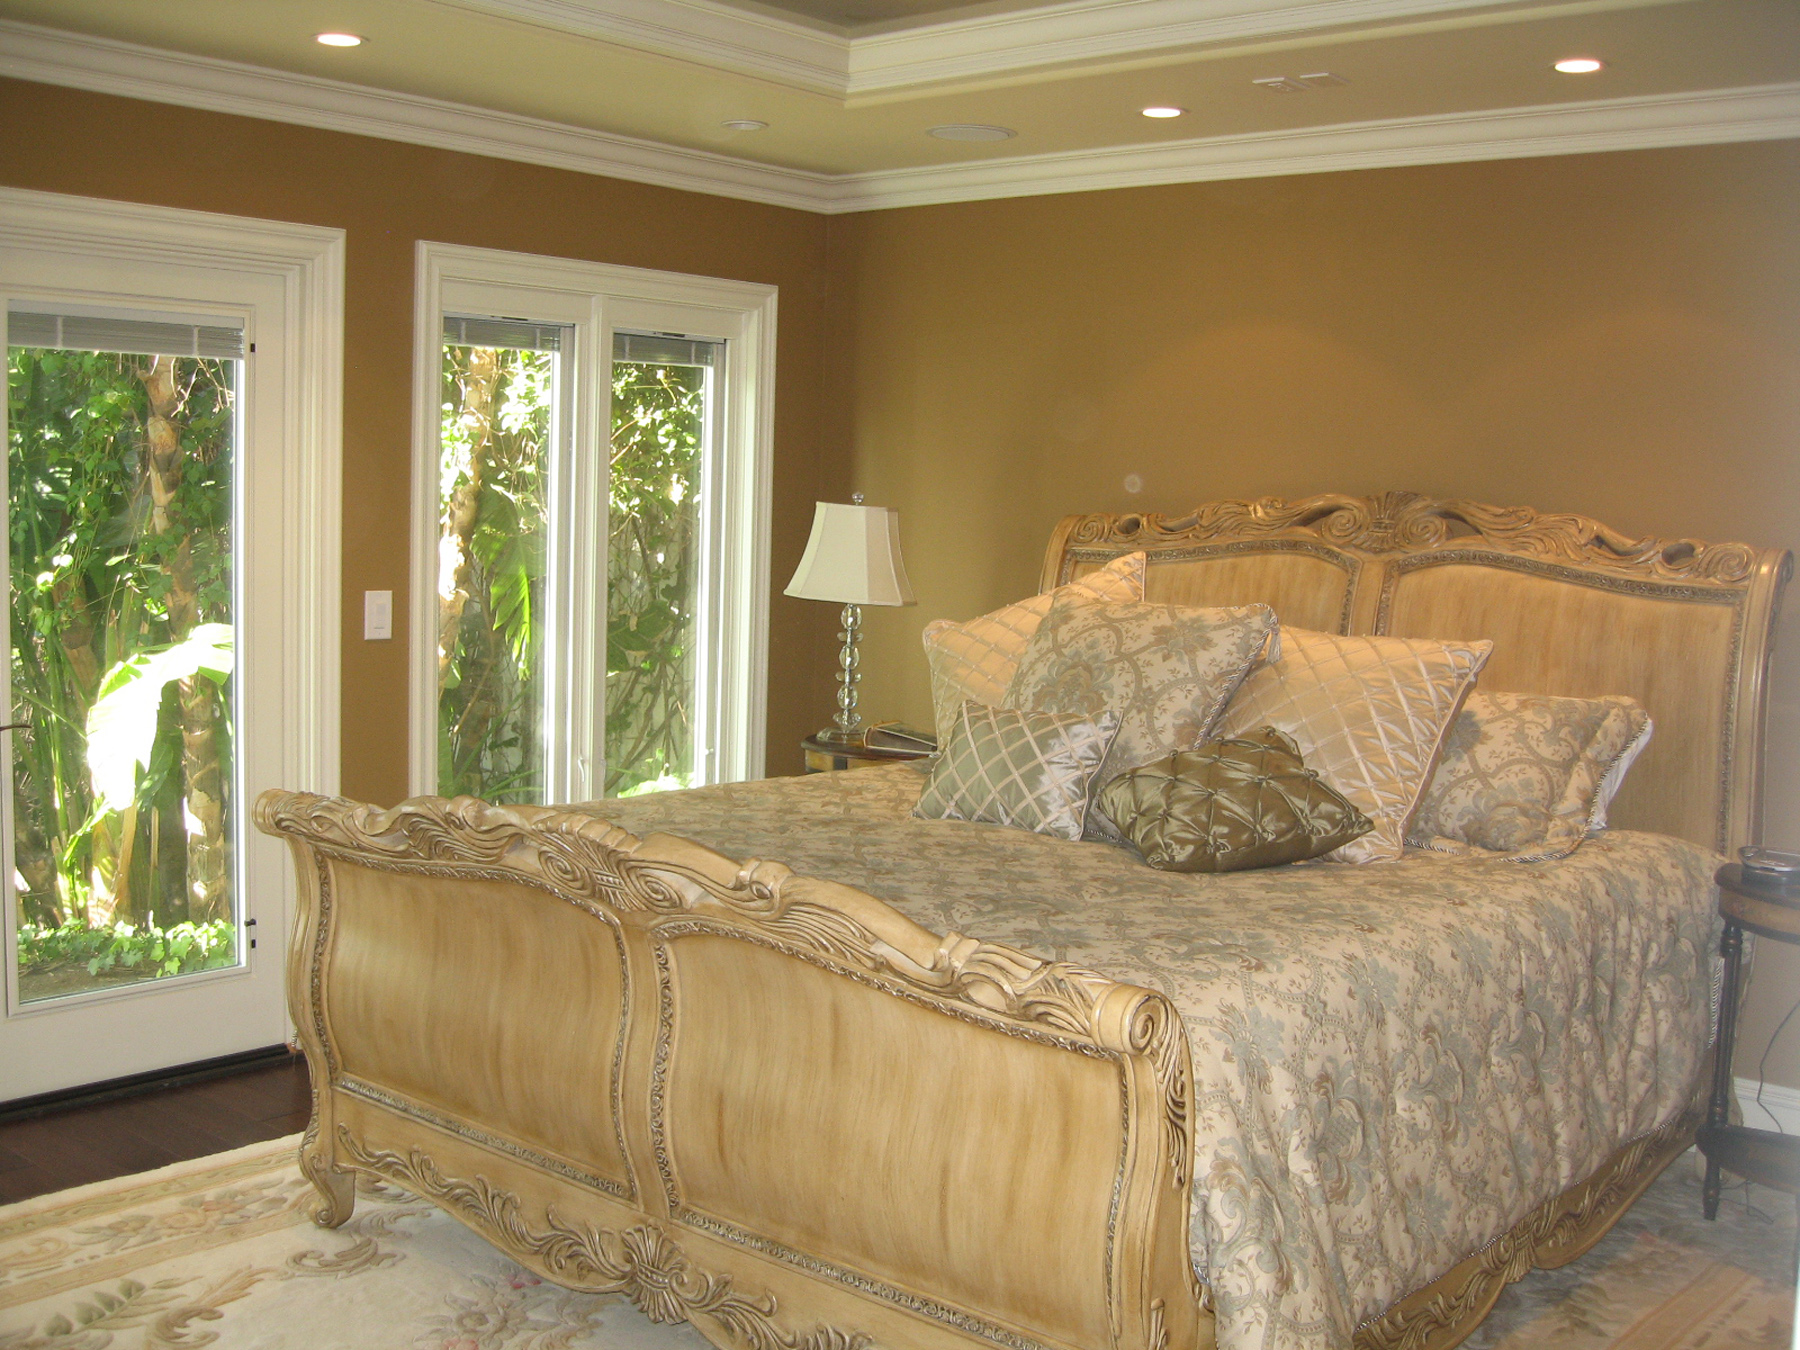 Do you want to change your environment but have been procrastinating due to fear? Fear of not knowing where to start? Thinking you need to completely remodel? Want to avoid the cost and inconvenience? Are you uncertain how to pick colors and finishes? Need some help? My forthcoming book “The Painted Vision” will help eliminate the reasons that may be preventing you from taking the steps necessary to transform your space. Learn to choose colors, specialty finishes and how to best use them. Understand your architecture, lighting and ways to build upon the positives in your home. This book is not only about color and design… it’s about you! Just a couple more weeks and it will be available… Stay tuned!
Finishing Fireplace Surrounds
Do you have a fireplace surround or mantle that is… well, just there? Is it because you’re not sure what to do with it? Many just leave it because they feel it’s much to costly to replace it, or maybe do not know what options are available. I have written what you can do about stone or brick fireplace surrounds in an article below.
Wood, concrete and pre-cast plaster is common materials used for surrounds. In the above photos, a tile and wood combination are used. I found the stained finish to be rather lifeless and lacking character. I felt the tile was to bright and also lacking interest. The architecture of the home is old world and these finishes missed the mark in my opinion. I felt a stain/paint combination would work best for the décor. To save on cost, I worked directly on the existing finishes. I made up a darker clear acrylic urethane and applied two coats on the mantle and trim molding. This darkened the finish making it look like a dark stain finish. I primed and painted the body. I them applied an aging wash to add a sense of time to the piece. Now it has much more interest than before.
The tile is a pours stone which accepted an acrylic wash. The wash made reducing acrylic paint with water. My goal was to just lose the Newness and look more Old World. This was very easy to do and as the picture demonstrates… a dramatic transformation.
Another material is Concrete or Pre-Cast Plaster. These can be stained or painted to any type of material that is authentic. What I mean is if your surround is very ornate, chances are it would not be made from granite because this material is very hard and difficult to carve. It would most likely be a softer stone like Limestone. When choosing a finish for your surround, be authentic to the design and also to your décor. Will a Brecca marble really go with you architecture and furnishings? I too often see finishes that do not complement the space. This in my opinion this produces tension in your environment rather than creating harmony.
The surround above is a pre-cast plaster. I was previously painted white. I liked the clean look of white but wanted to make it look authentic as well as add texture. I chose a soft limestone finish. This finish is subtle. It has a “feel” about it rather than a visual statement. I feel this type of finish adds to the space on a subliminal level – meaning it’s felt rather than seen – at least at first. You may notice it later but it doesn’t demand your attention.
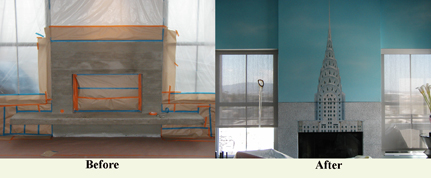
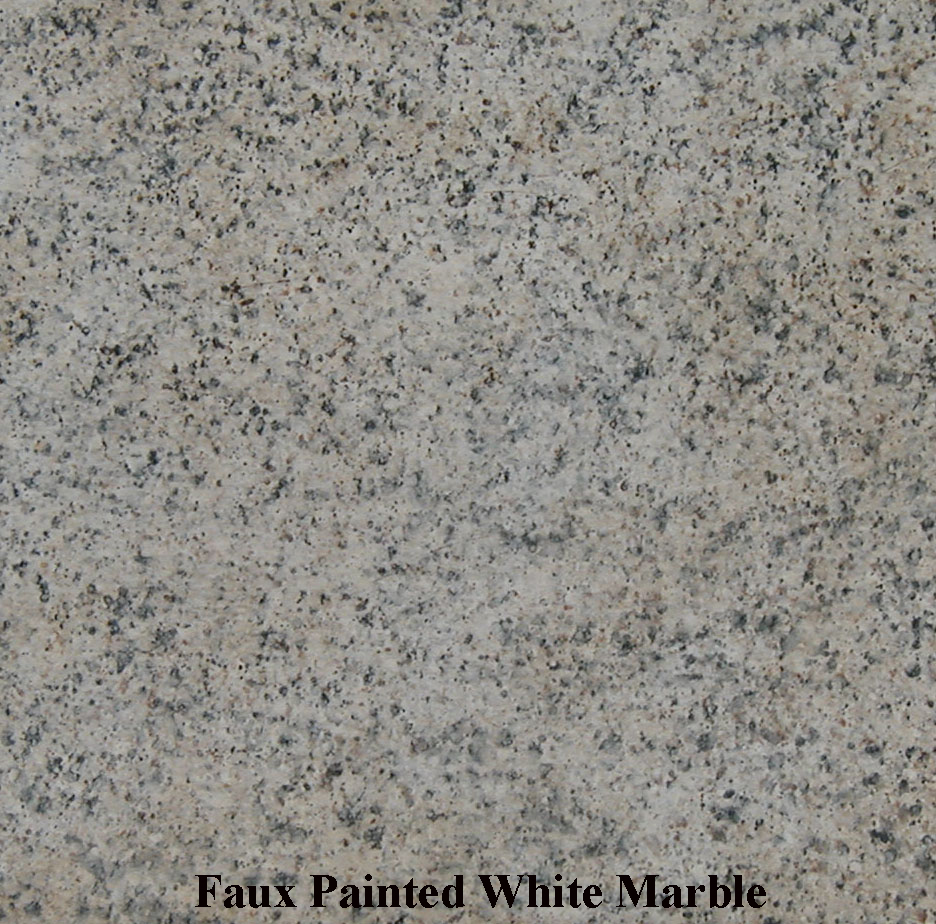
So you want attention? Well, here is an example. My client is fond of the Chrysler Building in New York. He commissioned me to paint a canvas of the building to hang over the fireplace. I suggested painting the concrete faux white granite.
My client then came up with the idea of painting a portion of the building onto the fireplace to minimize the look of the opening. The thought was to notice the painting rather than the square black hole in the wall. I hired a friend of my Danny Montes to paint the canvas in his shop and I did the rest on site. We hung the canvas and painted the remaining onto the fireplace. It worked. It’s a bit different, but it works for this space.
For more ideas and specialty finishes, please visit my website at: http://dinofauci.com
read moreFaux Painted Mosaic Tiles, Aged & Distressed Door and Utilizing Space Effectively
On one of my projects we are transforming what was a modern home, into a European/Traditional home. Just off the kitchen and next to the dining room is a powder room. Leading into the powder room was a small vestibule with lower and upper cabinets on one side. I wasn’t happy with the location of the room being so close to the kitchen and dinning room. The vestibule was not adding value to the home and was actually a poor use of space. Another unfavorable aspect was this room was facing the main staircase. So as you are walking downstairs, you are looking straight into the powder room.
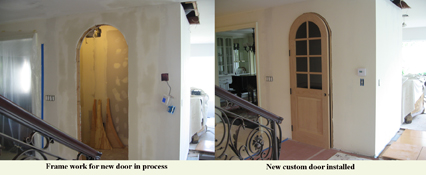
The vestibule had a wide opening with no door or frame. Since moving the powder room was not an option, I decided to place the passage door on the opposite side of the room. Now you would enter the powder room from the very long entryway. This will offer more privacy and eliminate the room being next to the food and dining area.
I came up with using the vestibule area as a bar/wine room. My clients like to entertain and there was no other logical place to have such a room. I wanted this room to be a show piece. It needed to be something special. I wanted to step into this room and have the feeling of stepping back in time. To start, I wanted the door to be an artifact in and of it self. We had a custom arched door and frame made. I also searched for and found antique glass. This glass contains very small imperfections, which adds to the authenticity of the old door. I then carefully distressed the door and frame and applied an aging finish. The door now looks old while retaining a definite sense of elegance.
The interior of the room is small so to create volume we raised the ceiling. Do to the structural limitations; the ceiling was not going to be even on all sides. This posed some finish challenges. I decided I would apply a faux aging effect or possibly a European plaster and then age that. While I was finishing the cabinetry, my clients were on vacation. They called from a restaurant where the ceiling was faux finished with large mosaic tiles. This restaurant was once a Masonic Bath House. They asked if I could do something similar in the new wine room. Of course my answer was YES!
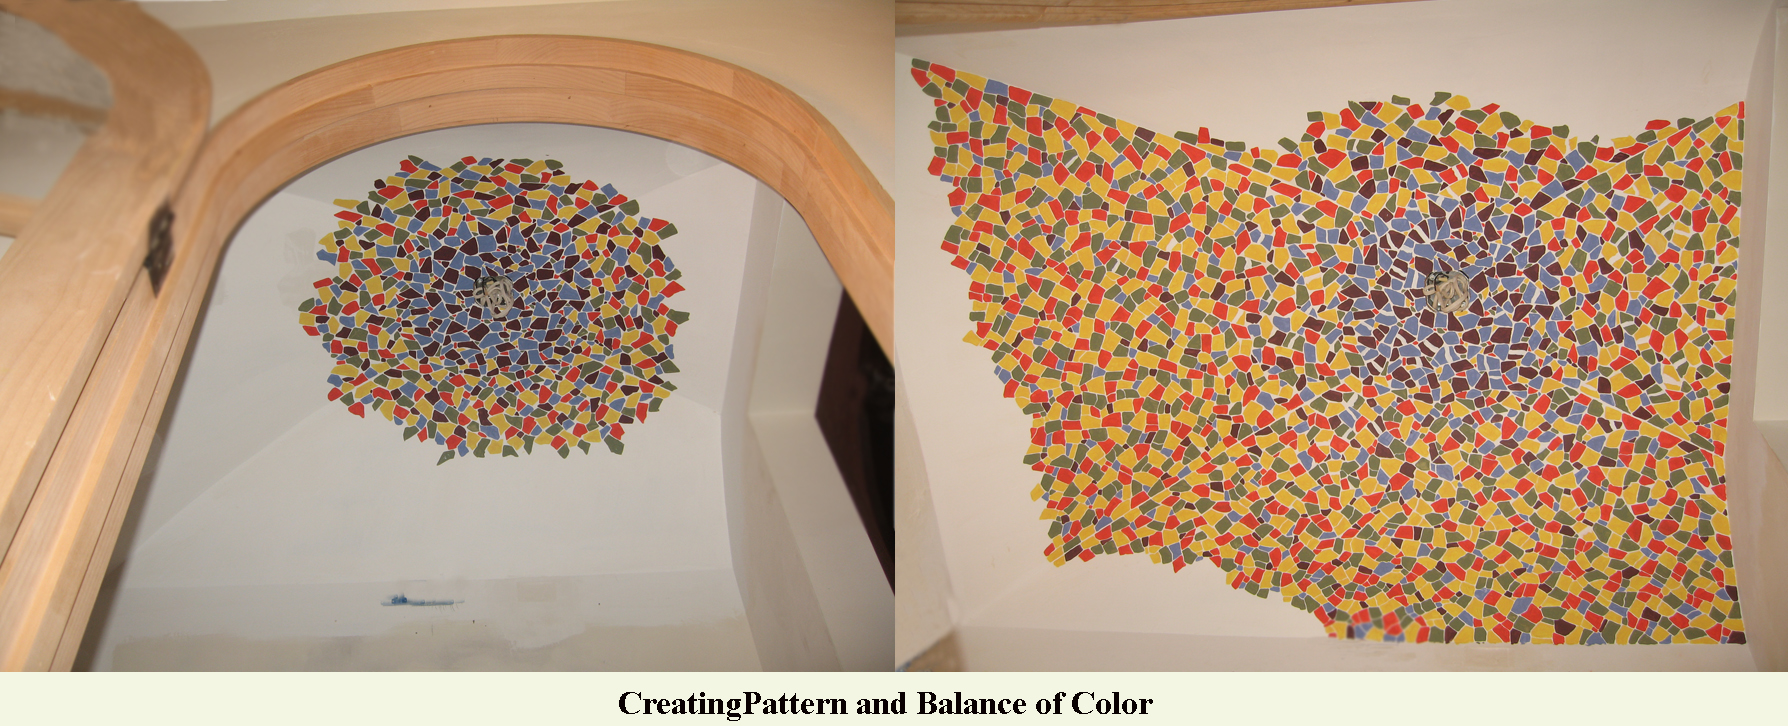
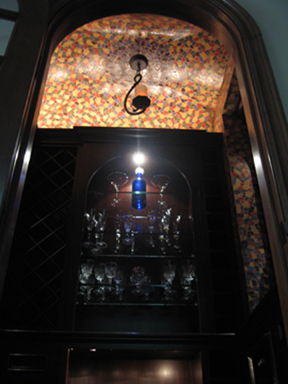
Before we installed the cabinetry, we selected the tile colors from a painting my client is fond of. I wanted to create a particular design but unfortunately due to the small size and uneven shape of the ceiling this wasn’t going to work well. I decided to create a darker medallion at the top surrounding the lighting fixture, and then gradate the colors into a random pattern. As the faux tiles moved closer to the cabinet counter top, I then introduced the same pattern used for the medallion. This created movement while adding strength to the base. Once I was finished, I aged the tiles and grout area to create the illusion of authentic tiles. Everyone that sees this room believes the tiles are real.
The lighting also needed to play into the theme of an old world wine room. We found a low wattage fixture that looks like a candle holder. It doesn’t give off much light so we installed a LED light strip on top of the cabinets. Now we can create a beautiful glow in the room simulating what may be created by a real candle.
The room is equipped with a small wine refrigerator, wine racks and open cabinets with glass shelving. It really is a little jewel. At night this room creates a relaxing experience. As you walk by the room and see the faux tiles with the lighting fixture, you feel like you could be in another place an time. This room adds character while still being in harmony with the overall design. The space was utilized in a way that added beauty and functional value to the home.
For additional information please visit my website at http://dinofauci.com
read moreTo Wallpaper or Not To Wallpaper ?
About thirty years ago I learned how to hang residential wallpaper, fabrics and commercial vinyl wall coverings. I understood the value in commercial applications but always struggled with wallpaper in homes because of all the negative aspects that came along with it. Some of the obvious negatives are visible seams, bubbles, peeling, repairing damaged areas, and the worst is when it comes time to redecorate and you need to remove the wallpaper. This is almost always a difficult and messy job. Many times people try to avoid this by painting over it. I don’t recommend doing this because it creates more problems that it solves.
Aside from these problems, I found many of the patterns to be overstated, or they did not create harmony for the space. I appreciate creating a theme or time period, but aside from that type of application, I often felt many of the patterns to be a distraction rather than adding value. Adding VALUE is a requirement of any design element. Some of the components that make up value in my world are Authenticity (design in context with architecture and other fixtures), Harmony (create balance and compliment rather than distract), Economics ( if cost is a major factor and a poor finish is the result, try something else) and finally, positives should ALWAYS outweigh the negatives.
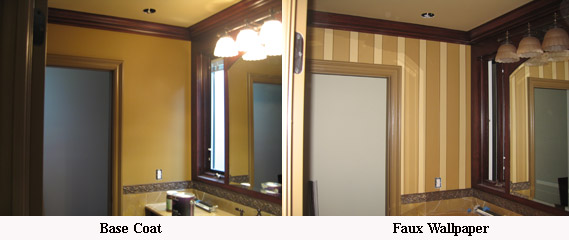
Years ago I learned the art of decorative painting. It quickly became clear to me that I could offer my clients the “look” of wallpaper, while eliminating all of the negative aspects. When a client called me to install wallpaper, I would suggest a decorative finish, or to recreate the wallpaper they liked using paint. Painting the finish gave us control of color and design while eliminating all of the other difficulties.
So before you decide to use wallpaper, think about a painted finish instead. A painted finish will not only offer a wide range of options, it will be easier to maintain and when it’s time to redecorate…just paint over it.
For more ideas on wall finishes, color and design, please visit my website at: http://dinofauci.com
read morePainting Your Floors!
Have you ever considered painting your floors? While this may not be for everyone, it certainly can solve many design challenges. Wood floors that can not withstand another sanding can be painted to get more life out of them. Some may cringe at the thought, but if done well, painted wood floors can look very elegant. The most common color to paint a wood floor is black, or charcoal. Various designs painted on top of the solid color, adds specific charm. Depending on your architecture and furnishings, this could be a great option.
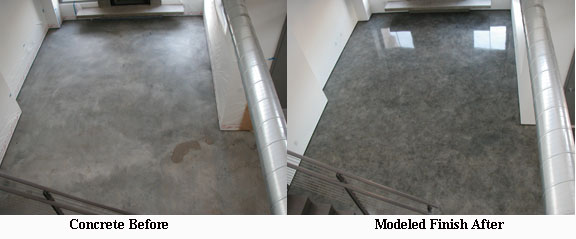
What if you have concrete floors? In this case the sky is the limit. You can paint your floors to resemble virtually any type of material. I had a project where the entire space was finished with concrete floors. In the main living area I created a modeled finish to hide patches and other blemishes. See the photos above.
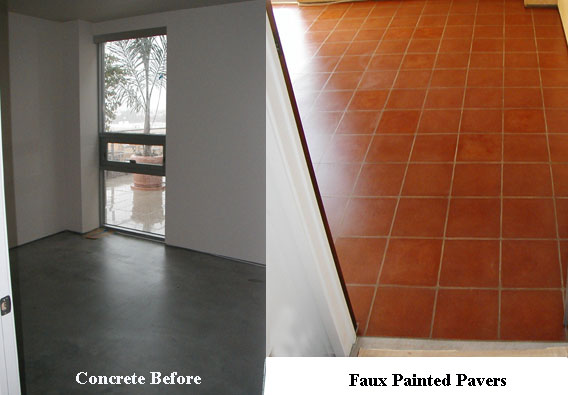
In one of the bedrooms my client wanted Spanish Pavers. The challenge of using real pavers would pose an elevation problem since the entire space was the same level of concrete. I suggested painting the pavers onto the concrete. This way the level of the floor would not be changed. They loved the idea. Everyone that has seen the floor believes it is real.
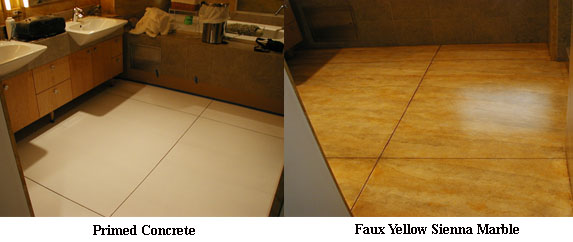
If you desire marble, this can be achieved as well. I once finished an entire bathroom by faux painting Yellow Sienna Marble on the ceiling, walls, doors and floor.
Concrete floors can be painted to look like wood planking, marble, granite, tile, what ever you can think of and have the capacity to do. If properly prepared, and finished with high-quality top coats, these finishes can last for years with minimal maintenance.
For more ideas on floors and other finishes, please visit my website at: http://dinofauci.com
read morePainting Chairs
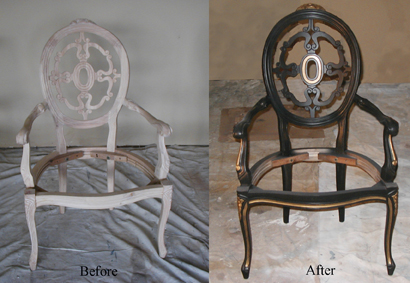 Do you have chairs that you’ve grown tired of? Maybe you like the style but the color or finish is not harmonious with your new decor? Thinking of getting new? Before going to that expense, consider transforming what you have. Giving these pieces new life is not as difficult as you might imagine. If the thought of stripping off the old finish has you stuck in your tracks, there is an alternative…paint them. I am certainly not suggesting using a spray can from the hardware store. That almost always looks horrible. I am suggesting being a little more creative with your finish. Think of using multiple colors, glazes; hand painted or stenciled designs, or there is a wide selection of acrylic metallic paints which really produce amazing results. You may be thinking this will not work for you because you want a stained finish. You can do that too!

I once had to match a chair to a desk that was made from burl wood; which you can see in the photo above. Because the surface area is generally small, your finish does not have to be perfect. You can achieve remarkable results by learning some basic faux wood-grain techniques. You can also save money by shopping stores that sell “unfinished” furniture. In doing so, you can apply any finish you like right from the beginning. Quite often it’s difficult to find just the right color. Paint allows you the freedom do to just about anything you can imagine. Don’t be afraid. Research books and magazines for ideas and get started. You will be happy you did. Trust me.
For more ideas and information on color and specialty finishes, please visit my website at: http://dinofauci.com and be sure to follow me on twitter at http://twitter.com/dinofauci and on facebook at http://facebook.com/dinofauci
Dino Fauci
read more






 Copyright © 2010 Dino Fauci Companies, Inc.